
Basic Steps for Configuring a Concur Profile
Be sure to follow these essential basic steps to set up your Concur profile for fast travel and even faster expense reimbursements.
1. Complete your personal profile in Concur at iBuy+ Travel
Why? First of all, updated information stored in your profile will make iBuy+ Travel reservations simple.
And, even if you never book travel via the iBuy+ Travel website, keeping your profile information current will assist you and/or your delegate in the creation of expense reports.
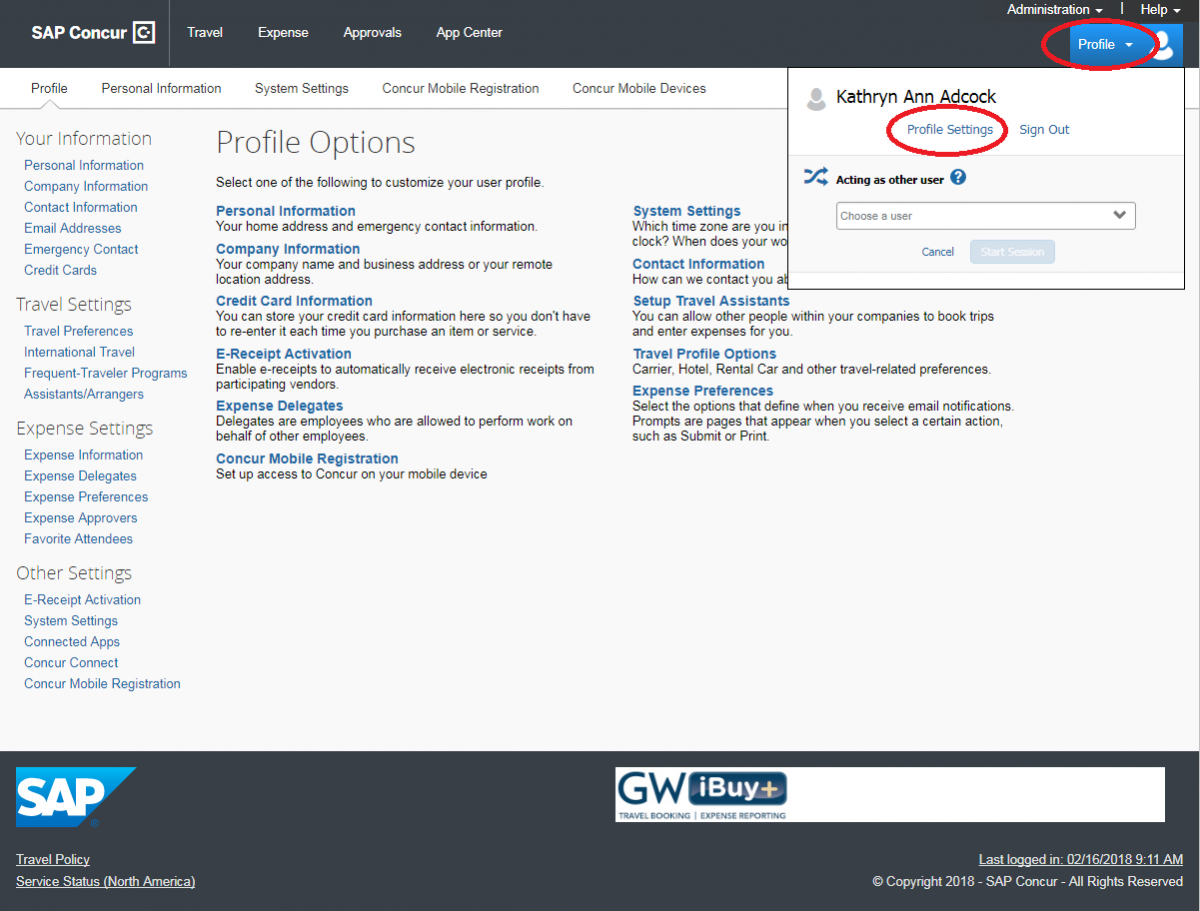
TIP #1: Check the email addresses listed in your profile. Be sure that you have both your @gwu.edu and your @email.gwu.edu emails listed in your profile. You may also want to add your personal email if you book your travel from a personal email and your booking confirmations go to your personal email account. If you are forwarding a receipt from an email account that is not in your profile, the receipt will not appear in Concur.
TIP #2: If you forward an email receipt to receipts concur [dot] com (receipts[at]concur[dot]com) from an email listed in your profile, Concur will load the receipt into your "Available Receipts" so a reimbursement can be created for an out-of-pocket expense, or matched to a P-Card transaction.
TIP #3: Add your work address and mobile telephone number. In the near future, Concur Locate will be available to you. Locate is a program that will provide security alerts, threat assessments, and communicate with you if a crisis event occurs while you are traveling. Including your work address and mobile phone number are essential for Locate to function properly and to be of the greatest benefit to you.
2. Link your Concur profile with a smartphone or tablet via the Concur App
gwu [dot] edu. The system will ask you for your PIN. Once you complete the login process all receipt pictures on your phone and travel information will sync between Concur and that device.
3. Link your Loyalty Accounts to supplier Apps in the Concur App Center


With My Travel Network you can:
- Receive your GW’s negotiated rates.
- Get e-receipts from participating programs, which will be waiting for you in Concur Expense.
- Access your travel plans anytime on any device, using Concur or TripIt.
Activating My Travel Network is easy: Sign in to iBuy+ Travel > Profile > Profile Settings > Frequent-Traveler Programs > I agree > OK.


4. Connect to TripIt and TripIt Pro
tripit [dot] com (plans[at]tripit[dot]com) and TripIt will instantly create a master itinerary for each of your trips that you can access anytime, anywhere. Plus, anything you book in iBuy+ Travel will automatically be added to your TripIt account.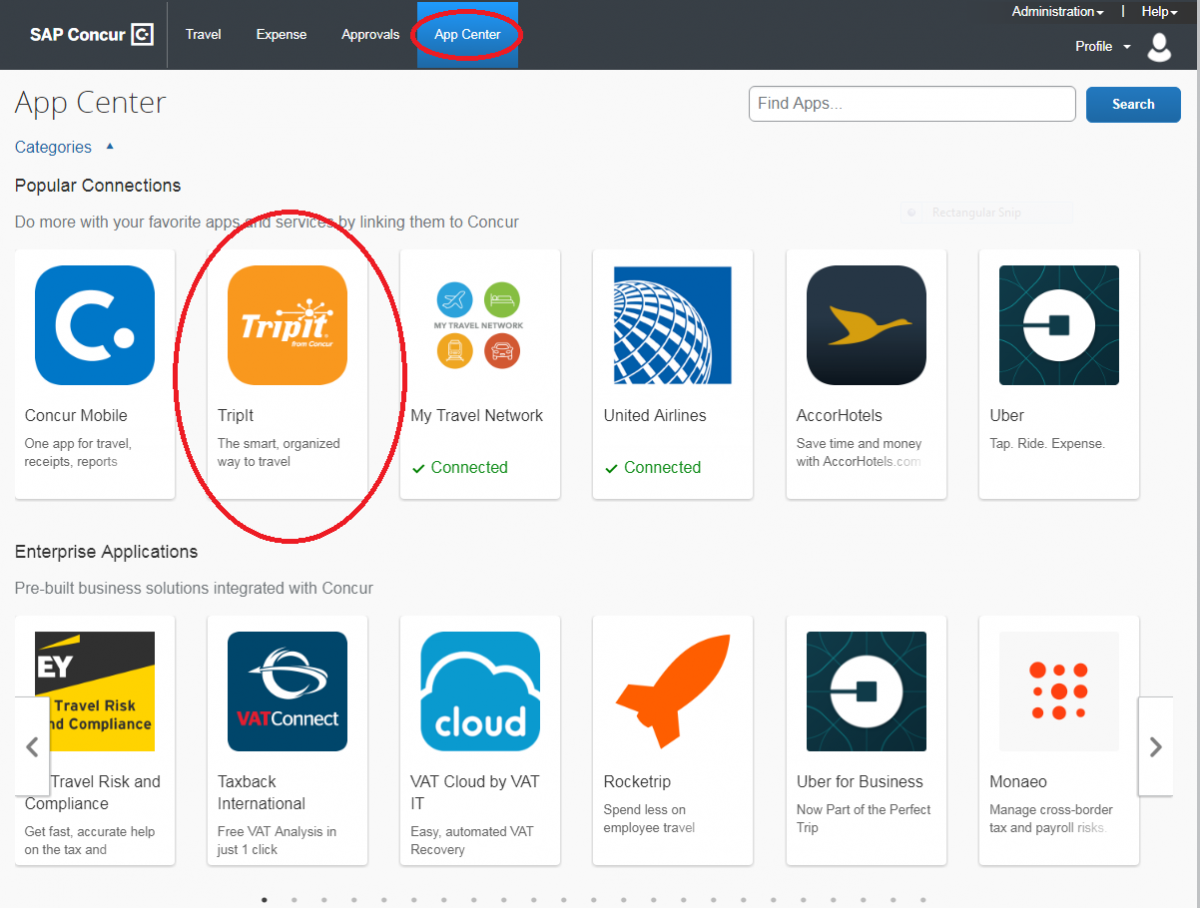
Importantly, the U.S. Transportation Safety Administration requires that the name on a traveler's government issued photo ID must match the name on the airline ticket. Please ensure that your name (first, middle, last) in your iBuy+ Travel profile matches the state/government-issued photo ID that you will be presenting at the airport. Failure to do so can hinder your ability to travel.